07 april 2024

New versions of program MakeMap


In version 2.3.0 the next items are added or changed:

  • The close buttons on both map types are now made with embedded buttons.

  • The download kml-file has been removed from the Google Earth web page.

  • All jAlbum skins do use now the same template file, the skin res directory is no longer used.

  • The MakeMap program can now also be used for the jAlbum Plain skin, see this Plain sample album, more info in this note.

  • If the new check-box Enable links has been cleared, no light-box with the corresponding slide page will be opened if you click on a way-point in the map and next in the thumbnail.

In version 2.4.0 the next feature has been added

It is now possible to display up to 8 tracks in an OpenStreetMap in different colors:

The following 8 file-names can be used to display tracks in OpenStreetMaps:

  • track.js, the default value in program ConvertTrack, wil show a red track.
  • trackGreen.js which will display a green track.
  • trackMagenta.js which will display a magenta track.
  • trackBlue.js which will display a blue track.
  • trackBlack.js which will display a black track.
  • trackBrown.js which will display a brown track.
  • trackYellow.js which will display a yellow track.
  • trackOrange.js which will display a orange track.
Example of of multi-track OpenStreetMap:


To see this on-line, open this album and click on the third button from the left (OSM kaart) or open the map directly.

In version 2.5.0 the next features have been added

  1. The new Plain and Lizard skins are now supported, see this Plain album and this Lizard album.
  2. It is now possible to use thumbnail images instead of fixed marker icons:

    see also the maps of this album.
  3. An OpenStreetView map is now centered around a selectable waypoint
  4. The zoom level of an OpenStreetView map is lowered for smaller devices.


19 maart 2024

How to show Route Maps in Albums made with the Plain, Lizard or Tiger skin


Introduction

With my Windows program MakeMap, you can make a map of all photo locations in an album made with most current jAlbum skins.

First you should download and install this program from my website.

I did not buy a Microsoft security certification, so during the installation you will see messages like 'Setup.exe is not downloaded frequently and can be dangerous' and 'Your PC is protected'. Ignore these messages and choose actions like 'More information' and/or 'Nevertheless, do the installation'.

You can make two types of maps: a Google Earth Map and an OpenStreeMap as has been described in the help-file.

The most simple way is to use an OpenStreetMap, because this does not require an API-key.

If the album shows pictures of a walking or cycle tour and you made a gpx-track of the tour with a GPS-device or a navigation app like Wikiloc, you can also add this track to the map. The easiest way to do that is to use my Windows program ConvertTrack, You can download and install this program from my website.

This note describes how you can make such a map for an album made with the skins made by Laza.

A simple OpenStreet Map

You can only make a map if your images contain a GPS location.

First make and upload the album and don't forget to select the settings to show a location button in the in the Lightbox.

Next open program MakeMap  and select the following settings:


The setting of 'Back button closes window' determines what happens if you click the close button in the upper right corner of a map. If you open the map in a new tab, you should check this check-mark. In most cases I open a map in a new tab, in which case  I check that checkmark.

Use the button 'Select Root directory' to select the root directory of your websile and enter the corresponding URL of your web-site in the text-box after 'External URL:'. The structure of the output folders on the PC must match the folder structure on the server.

If you follow the Album recommendation to use as output folder a sub-folder 'album' of the project folder (which I never do), you have to fill in these fields for each album you make: Put the absolute address of the album folder in field 'Local root folder' and the corresponding URL of that album in the 'External URL' field.

Note: You should not use ' or " characters in folder names or in URLs.

If you open the first combo-box in the MakeMap program you see the skins which are supported by program MakeMap. Select here 'Plain' for the Plain skin and 'Tiger' for the Tiger and Lizard skin.

For the Plain skin, you should clear check-mark 'Enable links', because with the  the Plain skin, it is not possible to open the light-box for a way-point showed on a map. However if you use include files as described in this note you can check this check-box. For the Tiger and Lizard skin you should also check this check-box.

Next browse with the 'Select a slide image' button to the slides output folder and select an image in that folder.

Next click on the button 'Make Map'. This will create two files in the output folder: a web-page OSM_Map.html and a file waypoints.js which contains the photo locations.

To see the result, click on the 'Show Waypoints in Map web-page'.

If you do not see all locations on the map, lower the 'Zoom level' and click again on the 'Make Map' button. If you like to see more details, raise the zoom level.

Next you should make a link to the generated map. The simplest way is to do that with a link in the album description via the HTML editor:


See 
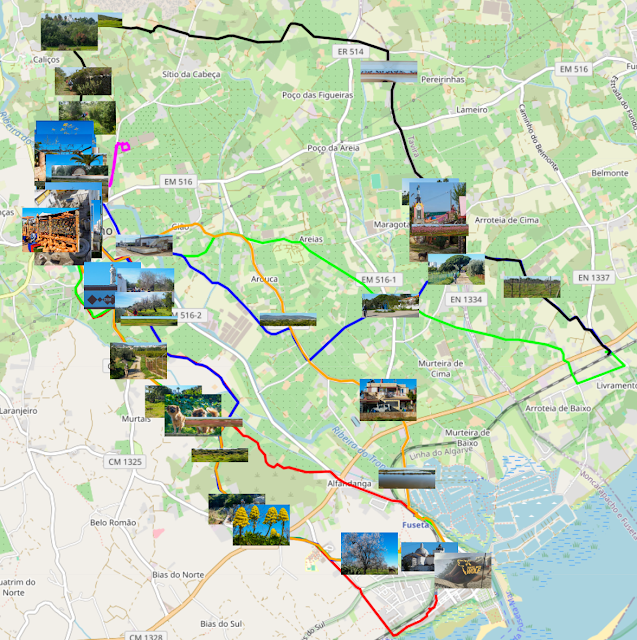
here an example of such a link.

Another way is to make a weblocation of the map. To do that open the uploaded album and replace the text 'index .html' in the browser address field by 'OSM_Map.html' and click on the return button. The map page opens and you see now the URL of the map page. Drag and drop that URL to your album or make a weblocation by clicking with the right mouse button in the explorer window and select weblocation, where you can also enter that URL.

Finally make and upload the album again. You will see an album like this example album.

Add a track to the OpenStreetMap

Open my program ConvertTrack and browse to the gpx-file via the 'Open' button:


Next click on the 'Save as...' (on the Dutch screen shot above showed as 'Sla op als...') button and save the file as trackl.js in the output folder of the album.

Finally upload the album again.

A simple Google Map

Follow the same procedure as has been described above for the OpenStreetMap, but select next settings after you opened Program MakeMap:


Notice that you have to enter your Google maps API key in the 'Google API key' field, this is the same key as you use in the skin Ligthbox 'API key' text-box.

After you selected an image in the slides folder and next clicked the 'Make Map' button, two files are created in the output folder: the web-page 'GoogleMap.html' and the file 'map.kml' which contains the photo locations.

After you made the map you can see the result by clicking on the button 'Show Waypoints in Google-Earth' if you installed the Google Earth program on your PC.

To use the other button 'Show waypoints in a web-page', you have first to upload the album with the new files.

Finally make the link to the GoogleMap.html' web-page and make and upload the album.

Add a track to the Google Map

You can do this only if you installed the Google Earth program on your PC.

Open my program ConvertTrack and browse to the gpx-file via the 'Open' button.

Next click on the 'Save as...' (on the Dutch screen shot above showed as 'Sla op als...') button and save the file as track.kml on your PC, for example in the output folder of the album. Open first your file map.kml and next file track.kml with program Google Earth:


Click with the right mouse button on 'Temporarily places' and next on

'Save location as...' and select file map.kml in the output directory. Overwrite file 'map.kml'.

Next upload the album again.

Open the Lightbox via the thumbnail in the Map

If you click on a waypoint in a generated map, a thumbnail will be showed like this:


If you click on the thumbnail, the lightbox with the correponding slide will be opened in most supported skins, see for example this PhotoSwipe skin album, this Tiger sample album and this Lizard sample album.

To use this with the Plain skin, you have to check check-box 'Enable links' in program MakeMap and you have to use at least one include file (user-code.js), see this note. See the result in this sample album. If you use this with the Plain skin, you should un-check the 'Lightbox triggers fullscreen mode' check-mark on the Lightbox settings tab, otherwise the ligthbox will not be opened. A change in the Plain skin code is required to solve this, as is done in my PhotoSwipe skin.


16 november 2023

Enhance the Plain skin via include files


Introduction

In version 2 of the Plain skin, most of the modifications discussed in my previous note have been added, except the points 4 and 5

In version 2 of the Plain skin Laza did implement on my request include files, which makes it possible to insert extra code in the skin, so there is no need to change the original skin code.

In this note I will show how you can enhance the Plain skin with new features, starting with making the lightbox background color equal to the index page background color.


Include files in Plain version 2.7

page-header.inc:

With an include file user-head.inc in the project directory, you can insert extra code just before the </head> tag. You could use that to add extra css-files of add css-code via <style> blocks. Code added via this file will be used in the root-album and in the folder albums.


user-style.css:

I used include file user-stylele.css to add extra css-code at the end of the common.css file. Code added via this file will also be used in the root-album and in the folder albums.

To see the code I used, download this file and all other files made in this note here. The extra code in the user-style.css file adds the following features:

  • It makes the text and background color of the lightbox equal to the text and background color of the thumbnails page.

  • The caption text color is also made equal to the text color of the thumbnails page.

  • The caption background color is also made equal to the background color of the thumbnails page, but it is made more transparent (Opaque of 60%). It is of course more flexible to change the Page background color control on the design tab in a color control which allows also the define the transparency or even better to add a new color control with transparency for a caption, but this time I did not want to change the UI.

  • copied the css-code used in my PhotoSwipe skin to make the the audio clip control smaller and more transparent.

  • Finally I added css-code for the extra buttons discussed below.

To see the result of these changes open this sample album.


user-code.js:

With file user-code.js you can add extra javascript code to be used in the root album and in the folder albums. I use that for maps made with my MakeMap program. To make it possible to open the lightbox directory from a route map for the corresponding image number, via an URL like this: ''https://andrewolff.jalbum.net/Sample_Project_Plain_inc/index.html?M18”, which opens the light-box for the 19th image in the album.

This is also used in this albumYou can find the used code in the zip-file and in this note.


user-options.inc:

The contents in this file is used to add and/or change options of the lightbox. You can find these options in the PhotoSwipe gallerydocumentation.


Code added via this file will be used in the root-album and in the folder albums.

In this sample album it is used to set the bgOpacity to 1, otherwise you see part of the thumbnails page and clicking in the image will start or stop the slideshow.

user-top.inc:

You can use this include file to insert extra html-code after the title of the index page. You have to save such a file in each image directory where you like to show the extra code.

user-top-all.inc:

You can use this include file to insert extra html-code after the title of the index page. You have to save such a file in the root image directory if you like to show the extra code in the root output directory and all other output folders.

In this https://andrewolff.jalbum.net/Sample_Project_Plain_inc/ it is used to add a theme image,

user-code.inc:

You can use this include file to insert extra html-code after the  description of the index page. You have to save such a file in each image directory where you like to show the extra code.

user-code-all.inc:

You can use this include file to insert extra html-code after the description of the index page. You have to save such a file in the root image directory if you like to show the extra codein the root output directory and all other output folders.

In this https://andrewolff.jalbum.net/Sample_Project_Plain_inc/ it is used to add buttons to open the route maps and to download the corresponding gpx-file as described in this note.

The buttons are only added if the corresponding file 'track.gpx', 'GoogleMap.html' or 'OSM_Map.html' is found in the album output directory..

user-footer.inc:

You can use this include file to insert extra html-code at the end of the index page. Code added via this file will be used in the root-album and in the folder albums.

I used this in the sample album to insert a copyright statement under the thumbnails. But because the statement is automatically inserted in all folder albums, you see in the sample album that 3 folder albums show the wrong copyright statement.


Desired changes

Use user-footer.inc for footer code for the current folder and use user-footer-all.inc for footer code for the root folder and all other folders,

Demo albums

All described include files can be downloaded here and you see the effect of the unmodified Plain skin in this sample album, in this Audio-clip demo album.


07 november 2023

New skin versions

My jAlbum skins have been updated:

FancyBox version 4.5.1.

PhotoSwipe version 5.7.2

LightGallery version 1.5.1

Slide Show 4 version 5.4.1


Survey of the changes:

  • If a description is given in a folder tile, a possible link is removed, because a link in a link will not work.

  • The description in a tile uses now also the 'Thumbnails text font-size', see this example album.

  • The Map.htt template file is changed so that the close button is better visible, see this example.

  • If a route map is shown with the OSM_Map.html web page made with my program MakeMap and the lightbox has been opened via a click in the thumbnail, you can now use the lightbox close button to return to the map, see this example. The latest version of MakeMap makes it also possible to disable opening the lightbox.

  • PhotoSwipe library version 5.4.2 is now used in res\photoswipe folder of the PhotoSwipe skin.

  • Style Blue has been added to the Slide Show 4 skin.


05 november 2023

New version 2.3 of my program MakeMap


Next items have been added or changed in version 2.3:

  • The close buttons on both map pages are now made with embedded buttons.
  • The download kml-file button has been removed from the Google Earth web page.

  • All skins do use now the same template file, the skin res directory is no longer used.

  • The MakeMap program can now also be used for the Plain skin, more info on this note.

  • If the new check-box 'Enable links' has been cleared, no Light-box with the corresponding slide page will be opened if you click on a waypoint in the map and next in the thumbnail.

You see the new check-box 'Enable links' at the top of the page:


If you clear check-box 'Enable links', no Light-box with the corresponding slide page will be opened if you click on a waypoint in the map and next on the thumbnail like this;:


See here for an example album which do not open the lightbox if you click in on the thumbnail.


You should clear this check-box if a lightbox of the skin can not be opened directly via an URL like this: ''https://andrewolff.jalbum.net/Sample_Project_Plain_inc/index.html?M18”, which opens the light-box for the 19th image in the album. It is recommended to clear this check-mark if you use an unmodified version of the Plain skin, unless you add the next user js-code via an include file 'user-code.js' to enable this:

document.addEventListener("DOMContentLoaded", function()  {
    if ((window.location.search.length) > 0) {
        var str = window.location.search.substring(1);
        if (str.substring(0, 1) == "M") {
            str = str.substring(1);
        }
        if ((str.substring(0, 1) != "f") && (str.substring(0, 1) != "_")) {
            openLightbox(parseInt(str));
}
    }
});

function openLightbox(slideNr) {
    if (slideNr < 0) slideNr = 0;
    const x = document.querySelectorAll(".main .card.image > .thumb,.card.video > .thumb");
    if (x) x[slideNr].click();
}

For an example, open this album.

More information in the Help-file and on the jAlbum forum.

19 oktober 2023

How to enhance the Plain skin


Summary


In this jAlbum forum thread I showed how the Plain skin could show the location in a Leaflet OpenStreet map and in this thread I showed how the PhotoSwipe lightbox could be replaced by the LightGallery lightbox which is also used in my LightGallery skin.
Because my big friend Jeff Tucker blocked my access to the forum and removed all version information and jaskin files, I did publish new versions in the Plain-LG demo album and now I continued the reporting about the exercise here in this blog.
These modifications were done with a Plain skin version which used a  BeanShell GUI, but the current version 1.0.4 uses a compiled GUI, which requires the NetBeans program for changes.

So I investigated now how version 1.0.4 could be modified.
The result is a Plain_M version 1.0.4B which contains the following enhancements:
  1. The Thumbnails caption selection box has been copied to the Lightbox tab and can now be used to select a caption below the image in the lightbox.
  2. Thumbnails caption bug in Plain 1.0.4 repaired.
  3. If the API-key field is empty, a Leaflet OpenStreet map will be used to display the location.
  4. In the HEAD section code can be added via a file  page-header_0.inc in the image directory.
  5. The lightbox background color is equal to the index page background color.

This example album shows the result and allows you to download the the jaskin file used to make this album.

This album uses the following settings in the modified lightbox tab:


The caption box in the Thumbnails tab is empty.

The implementation 


First you copy the the Plain map from the standard jAlbum skin directory C:\Program Files\jAlbum\skins to a Plain-M folder in the directory used for skins made by volunteers C:\Users\Andre\AppData\Roaming\JAlbum\skins

Next you install NetBeans and JAVA tools as described in the thread Compiling a skin's user interfaceCreate a new project Plain-M as described in the thread.
Copy file Gui.java from directory C:\Program Files\jAlbum\skins\Plain\src\plain to the NetBeans src directory, in my case D:\Andre\Documents\NetBeansProjects\Plain-M\src.

For this version I copied in Netbeans the code of the caption selection boxes from the Thumbnails panel to the Lightbox panel and renamed the copied controls, for instance I renamed the thumbnailItems control into slideItems control.

I added also a label hintOSMLabel and added the corresponding text in the Plain-M text.properties file:

ui.hintOSM=To use an OpenStreet map, leave the next field empty

Translate this string to other languages via menu Tools / Translator / Update ALL skin translations (auto translate).

After compiling the changed  Gui.java file, you will find the corresponding Plain-M.jar file in folder D:\Andre\Documents\NetBeansProjects\Plain-M\dist. Move file Plain-M.jar to the skin directory C:\Users\Andre\AppData\Roaming\JAlbum\skins\Plain-M\lib and overwrite the existing file.

To see the modified Gui.java file, download the Plain-M.jaskin file and open after the installation folder C:\Users\Andre\AppData\Roaming\JAlbum\skins\Plain-M\src\plain.

Next edit in jAlbum the template files. All my changes are indicated as comments with the letters AW in the skin directory C:\Users\Andre\AppData\Roaming\JAlbum\skins\Plain-M.
Note that these template files uses a js-shell, so you should use javascript code in these files. I use sometimes ChatGPT to convert JAVA code to javascript code.

For the OpenStreet maps implementation I changed files init.js, index.htt and photoswipe-init.js.

The slide captions are added as described in the PhotoSwipe documentation
To keep it simple, the slide captions are saved in the alt attributes.
I added a simplified version to file  photoswipe-init.js:

// <AW
   lightbox.on('uiRegister', function() {
    lightbox.pswp.ui.registerElement({
        name: 'custom-caption',
        order: 9,
        isButton: false,
        appendTo: 'root',
        html: 'Caption text',
        onInit: (el, pswp) => {
            lightbox.pswp.on('change', () => {
                const currSlideElement = lightbox.pswp.currSlide.data.element;
                let captionHTML = '';
                if (currSlideElement) {
                        // get caption from alt attribute
                        captionHTML = currSlideElement.querySelector('img').getAttribute('alt');
                }
                if (captionHTML.length > 0) {
     el.style.display = 'block';
     el.innerHTML = captionHTML;
   }
   else  el.style.display = 'none';
            });
        }
    });
});
// AW>

The required CSS code is added to file common.css:

/***< AW ****************************************  Customized lightbox  captios */
 .pswp__bg {
    background-color: ${pageBgColor};
  }

.pswp__custom-caption {
  position: absolute;
  color: ${textColor};
  left: 50%;
  transform: translateX(-50%);
  text-align: center;
  background-color: ${pageBgColor}; 
  padding: 4px 18px;
  border-radius: 4px;
  bottom: 16px;
}
 .pswp__custom-caption a {
    color: ${textColor};
}
/*******************************************  AW> */

To save the slide captions in the alt attribute I had to change file index.htt, but also file util.js in C:\Users\Andre\AppData\Roaming\JAlbum\skins\Plain-M\lib
In that file I used a quick and dirty solution by copying function getCaption which uses control thumbnailItems to a new function getSlideCaption which uses the new control slideItems. I changed also  function getThumbnailElement which processes the alt attribute.

This is a very simple solution to add captions. My PhotoSwipe skin uses the dynamic caption plugin  which offers much more features: captions which do not overlap the image, captions in the sidebar and you can change the caption colors, see some examples in this example album.


Modification of version 2.4

In version 2 of the Plain skin, most of the modifications discussed above have been added, except the points 4 and 5.

To make the lightbox background color equal to the index page background color you can use in version 2.4 include files.

This has been decribed in my note Enhance the Plain skin via include files.

.


26 september 2023

How to use a video or slide-show instead of a theme image with jAlbum


How to use a video or slide-show instead of a theme image with jAlbum


With the latest version 5.7.1 of my PhotoSwipe skin, the latest version 4.5.0 of my FancyBox skin and with the latest version 1.5.0 of my LightGallery skin it is possible to replace the theme image by a video or slide-show if you make a jAlbum web-album.

In both cases, you have first to remove the theme image:

  1. Open the Explorer, click with the right mouse button in the Theme image in the lower right corner and select Remove.

  2. Open the skin Index page / Theme image tab and clear field 'Theme image'.

  3. Finally clear check-box 'If this field is blank or …'

Next open the Index page / Footer tab and check the new check-mark 'After the theme image'.

The other requred actions depends on the type of Theme image replacement.

Use a video instead of a theme image

Enter the next code in the html code text-box Index page / Footer tab:

<div class="iframe-container iframe-container-Video">   

<iframe class="frame" src="https://www.youtube.com/embed/YN5avcf43OE?autoplay=1&mute=1" allow="accelerometer; autoplay; encrypted-media; gyroscope; picture-in-picture" allowfullscreen></iframe>

</div>


Next enter this CSS code in the CSS code text-box on the Custom code tab:

.iframe-container { position: relative; height: 0; }

.iframe-container-Video { padding-bottom:40% }

.iframe-container iframe { border: none; position: absolute; top:0; left: 0; width: 100%; height: 100%; }


Play with the padding-bottom % to get the desired display.

The youtube src string depends on the video you like to show.

To get this string, click on the 'Share' button below your selected video and next on the 'Embed video' button.

Finally make and upload the album,

For an example of an album with a video instead of a theme image, open my Drenthe album.

Use a slide-show instead of a theme image

First you should make the slide-show you like to use as a replacement of the theme image. You can use all my 3 skins to do that, but I recommend to use my LightGallery skin, because that skins has a large selection of slide-show transitions.

Select for the slide-show images with a large width / height ratio and use a large width x height images bounds:


If you like, you can make the ratio the same for all images with a fixed shape filter:

filter1

class=FixedShapeFilter all prescale

Enter this string in the Advanced / User Variables tab:

Control the cropping, click with the right mouse button in the image and select 'Set crop focus...' and select option 'thumbnails bounds' (for for me unknown reasons, there is no 'image bounds' option).


On the skin 'General settings tab select check-marks 'Skip thumbnails pages' and 'Disable Viewer settngs' and select a 100% transparent color for the 'Page background color'.

On the skin Slide page / Layout page', clear the next check-marks: 'Prevent that the description overlaps the image' and clear all check-marks in the 'Show as description in the caption bar or side panel'.

On the skin Slide page / Options, select the slide show parameters and set / clear the next check-marks:

Next make the slide-show as you see in this example.

Now open the project file of the album where you like to use the slide-show instead of the theme image.

Enter the next code in the html code text-box Index page / Footer tab:

<div class="iframe-container iframe-container-slideShow">

    <iframe scrolling="no" src="https://www.andrewolff.nl/FotoSerie/AlgarveSlideShow_LG/"></iframe>

</div>

Enter here the URL of the slide-show you made above,

Next enter this CSS code in the CSS code text-box on the Custom code tab:

.iframe-container { position: relative; height: 0; }

.iframe-container-slideShow { padding-bottom:25% }

.iframe-container iframe { border: none; position: absolute; top:0; left: 0; width: 100%; height: 100%; }

Play with the padding-bottom % to get the desired display.

Finally make and upload the album and you see something like my Algarve album.